Note
Access to this page requires authorization. You can try signing in or changing directories.
Access to this page requires authorization. You can try changing directories.
This tutorial shows you how to use dynamic content in Microsoft Fabric data pipelines. When you create a variable library item and add variables to it, you can automate values for various stages of your deployment pipeline. In this tutorial, you copy data from one lakehouse to another. Then you use the variable library to set the source and destination values for the copy activity.
In this tutorial, you:
- Create a variable library.
- Add variables to the library.
- Define additional value sets for the variables.
- Consume the variables in another item in the workspace (a data pipeline).
- Edit the variables in a Git repository.
- Create a deployment pipeline and deploy the variable library.
- Change the active value set in the target stage of the deployment pipeline.
- Show that the value of the variable complies with the active value set in each stage.
The following diagram shows the workspace layout for this tutorial.
Note
The Fabric variable library item is currently in preview.
Prerequisites
A Fabric tenant account with an active subscription. Create an account for free.
The following tenant switches enabled from the admin portal:
- Users can create Fabric items
- Users can create variable libraries
The tenant admin, capacity admin, or workspace admin can enable these switches, depending on your organization's settings.
Create the Stage LHs workspace, SourceLH_Stage lakehouse with sample data, and Pipeline_Stage pipeline
First, create a workspace and lakehouse to use as your initial staging data:
Go to Power BI.
On the sidebar, select Workspace.
Create a workspace. Call it Stage LHs.
Create a lakehouse:
Create a pipeline:
In the lakehouse, select New data pipeline.
Enter the name Pipeline_Stage, and then select Create.
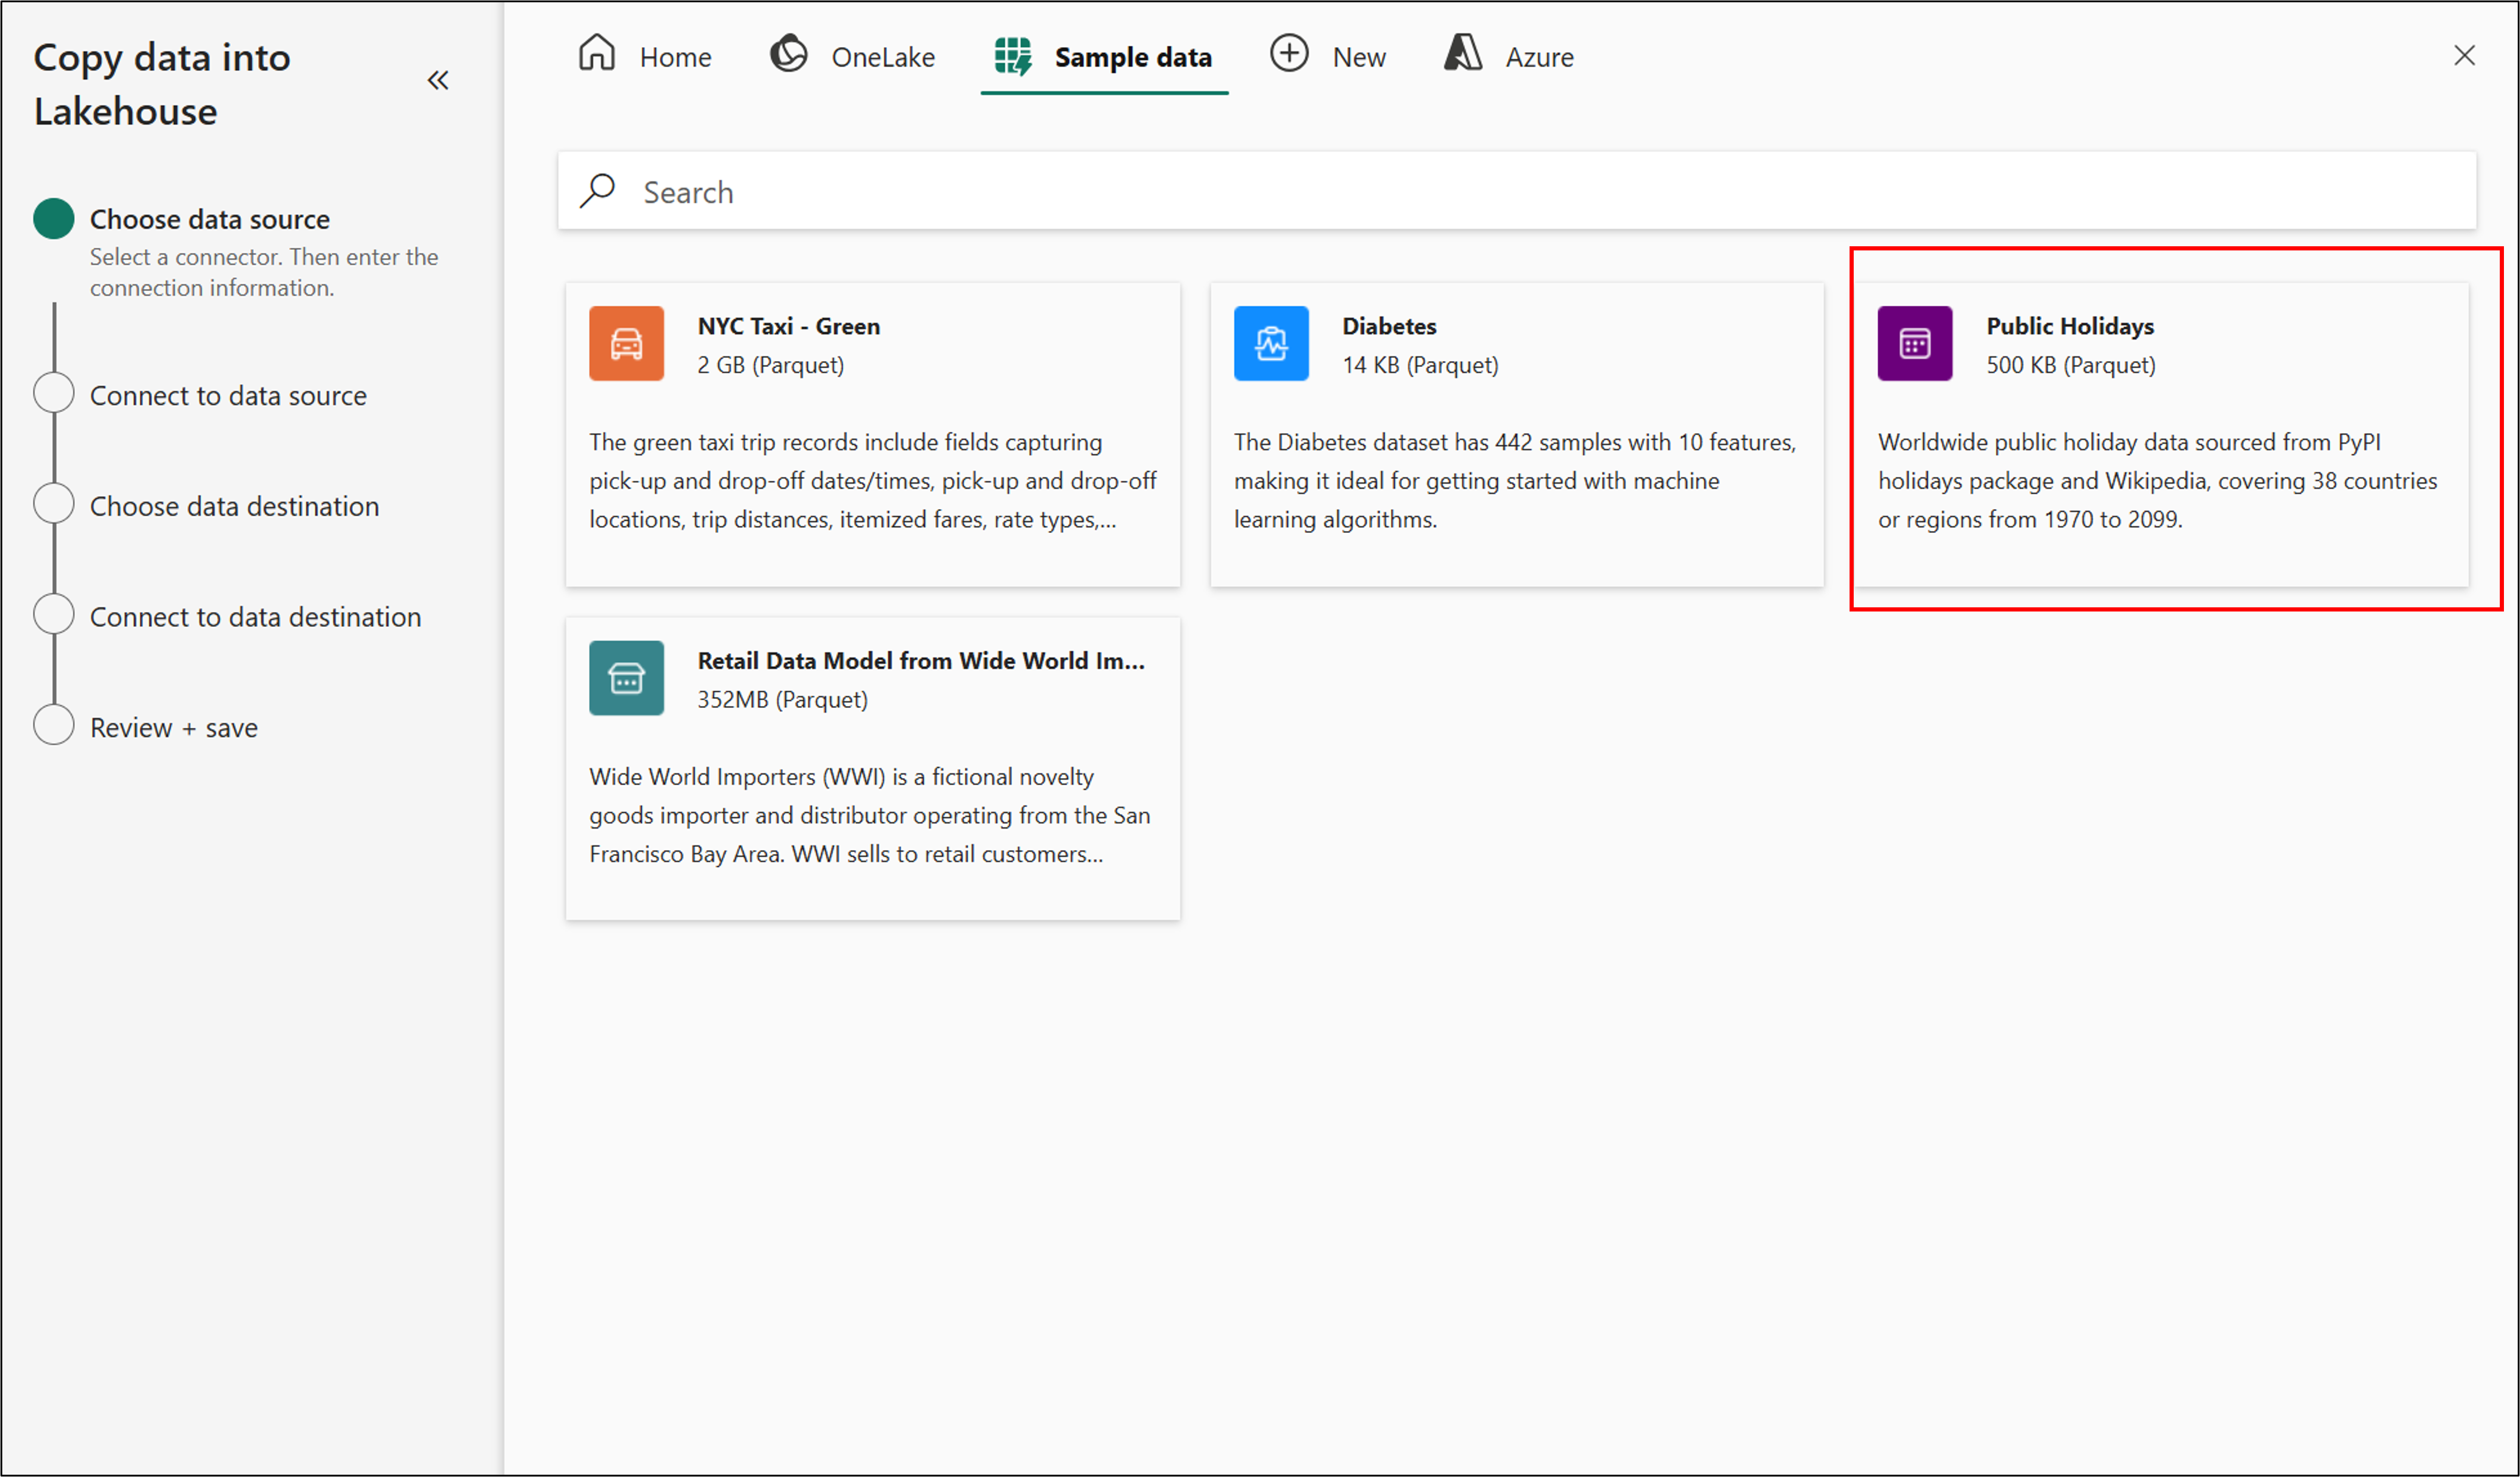
In the Copy data into Lakehouse wizard, on the Choose data source page, select Sample data.
Select Public Holidays.
After the sample data finishes loading, select Next.
On the Connect to data destination page, select Next.
On the Review + save page, select Save + Run.
Create the Source LHs with Variables workspace
Now, create the workspace that you'll work out of and use with your variable library:
Go to Power BI.
On the sidebar, select Workspace.
Create a workspace. Call it Source LHs with Variables.
Create the SourceLH_Dev, SourceLH_Test, and SourceLH_Prod lakehouses
Next, create the three lakehouses to use with the variable library:
Create the first lakehouse:
On the sidebar, select the Source LHs with Variables workspace.
Select New item.
Under Store data, select Lakehouse.
Enter the name SourceLH_Dev, and then select Create.
Create the second lakehouse by following the preceding steps. Name it SourceLH_Test.
Create the third lakehouse by following the preceding steps. Name it SourceLH_Prod.
On the sidebar, select the Source LHs with Variables workspace and make sure that it contains all the newly created lakehouses.
Get the workspace IDs and object IDs for lakehouses
In these steps, you get the unique identifiers to use in your variable library:
In Power BI, on the sidebar, select the Stage LHs workspace.
In the workspace, select the SourceLH_Stage lakehouse.
Copy the workspace ID and the lakehouse object ID in the URL.
Repeat the preceding steps for the SourceLH_Dev and SourceLH_Test lakehouses in the Source LHs with Variables workspace.
Create a variable library with variables
Now, create the variable library:
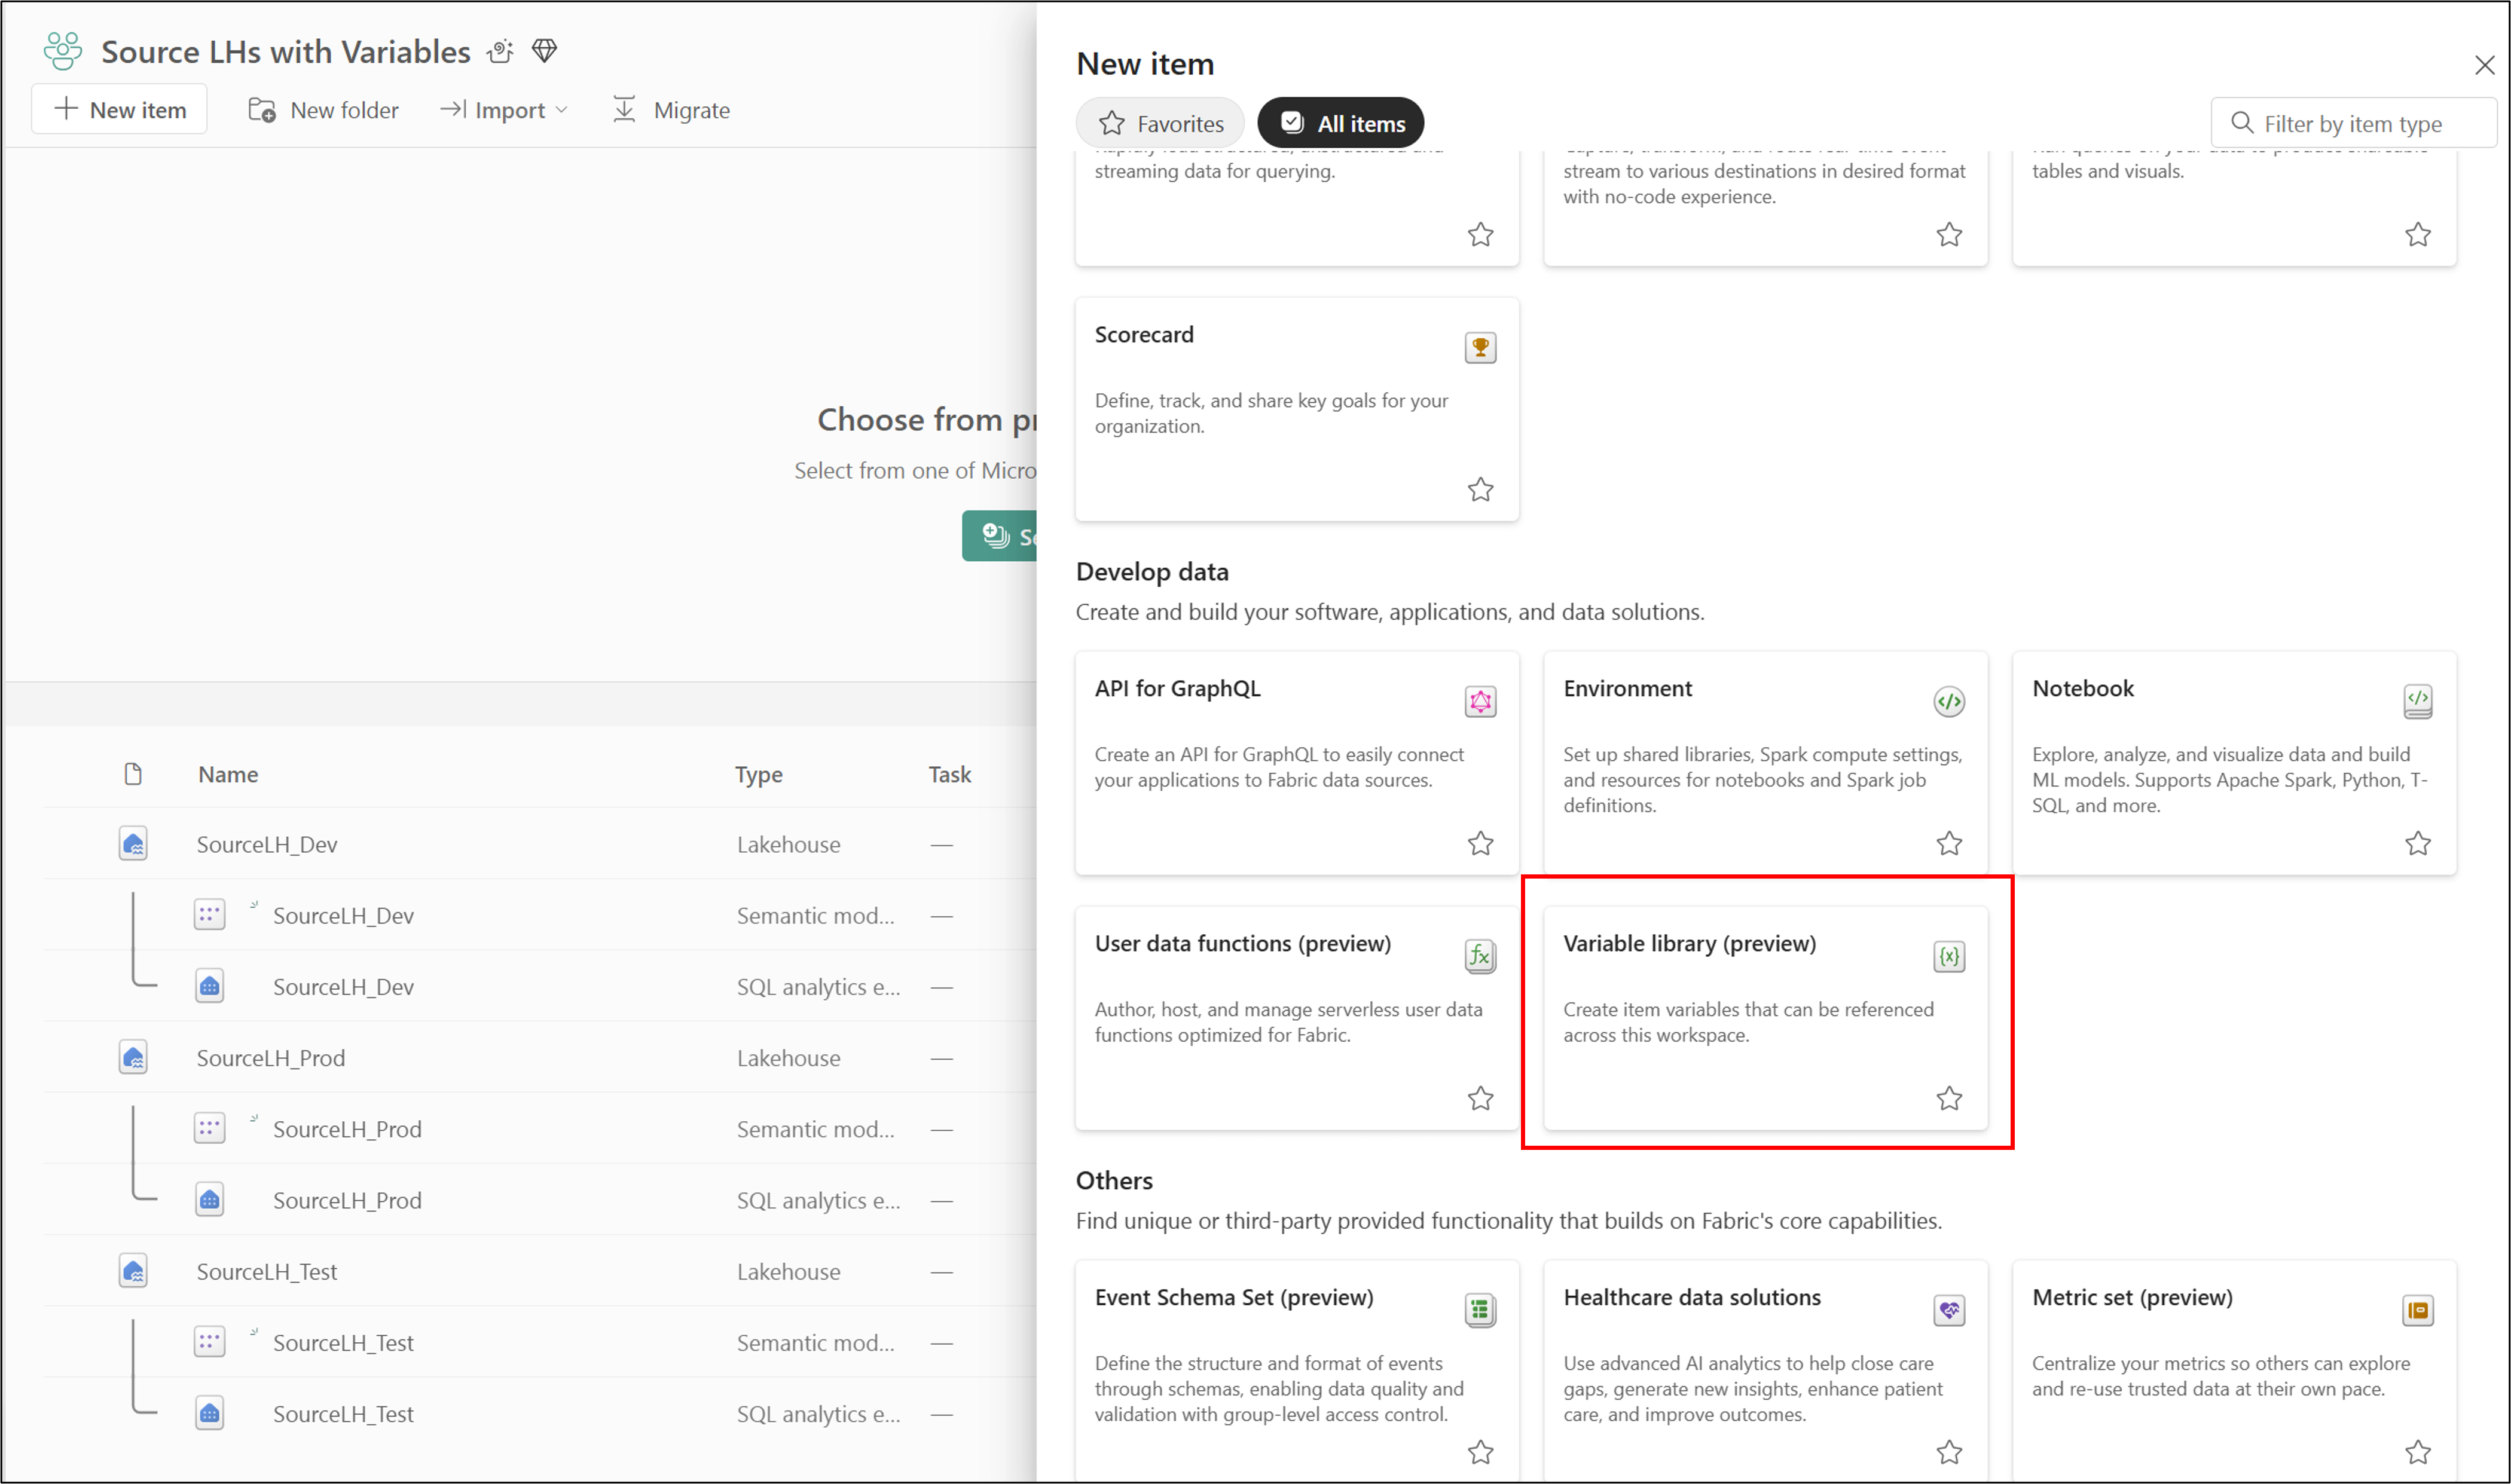
In the Source LHs with Variables workspace, select New item.
Under Develop data, select Variable library (preview).
Name the library WS variables, and then select Create.
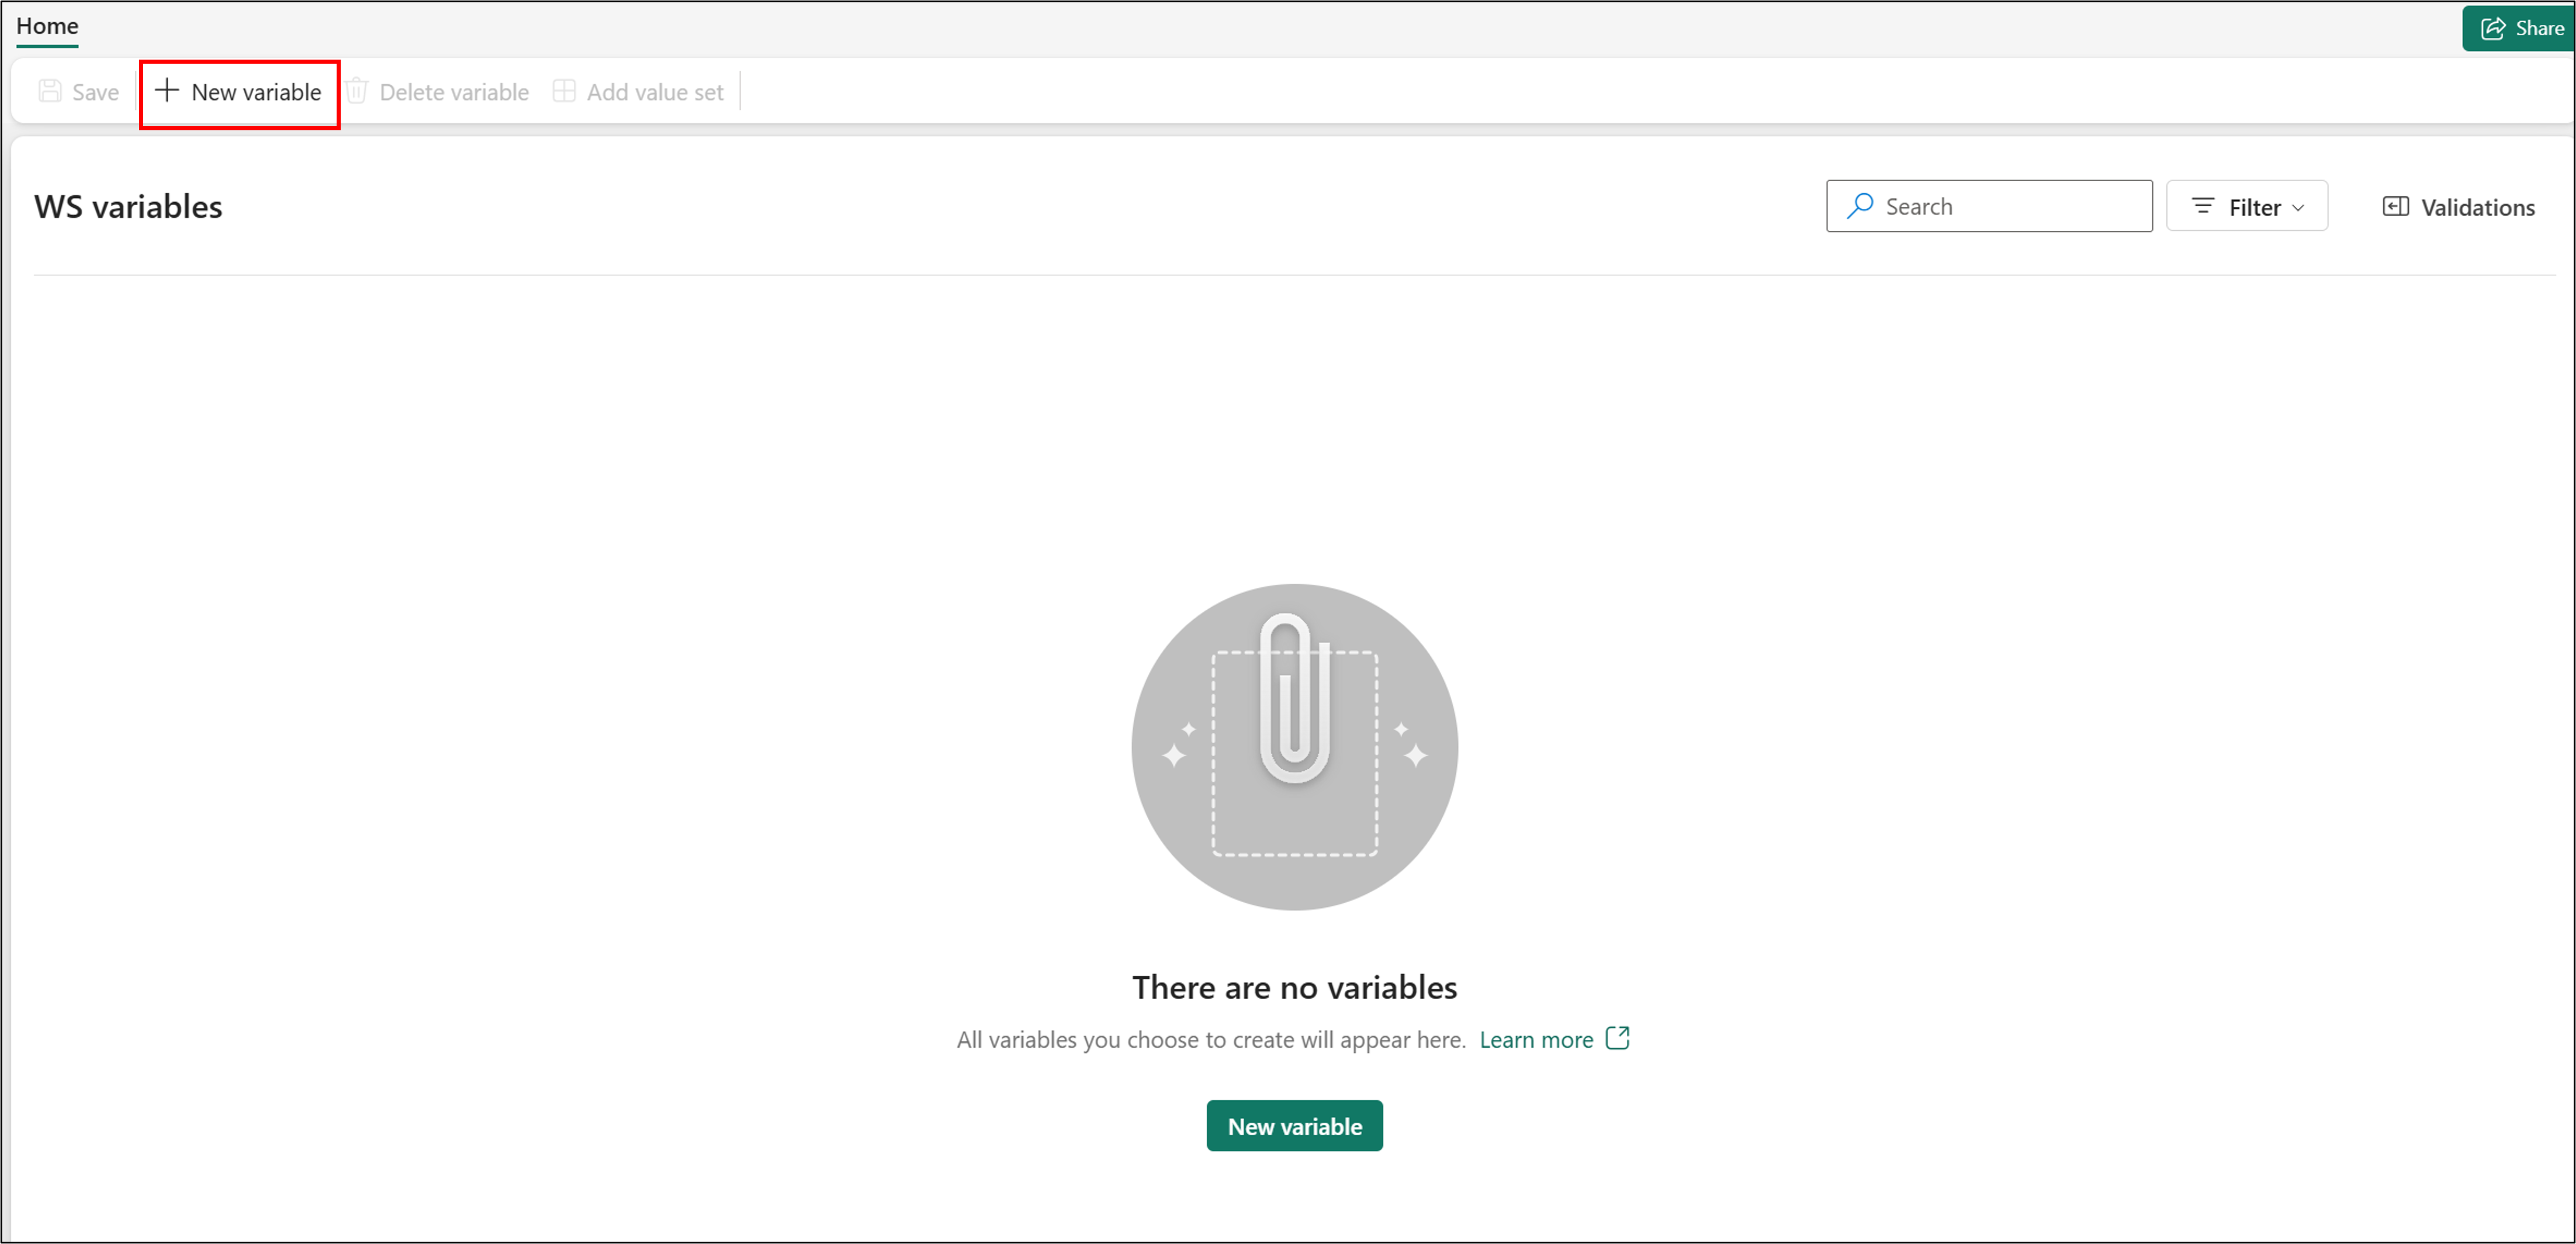
Select New variable.
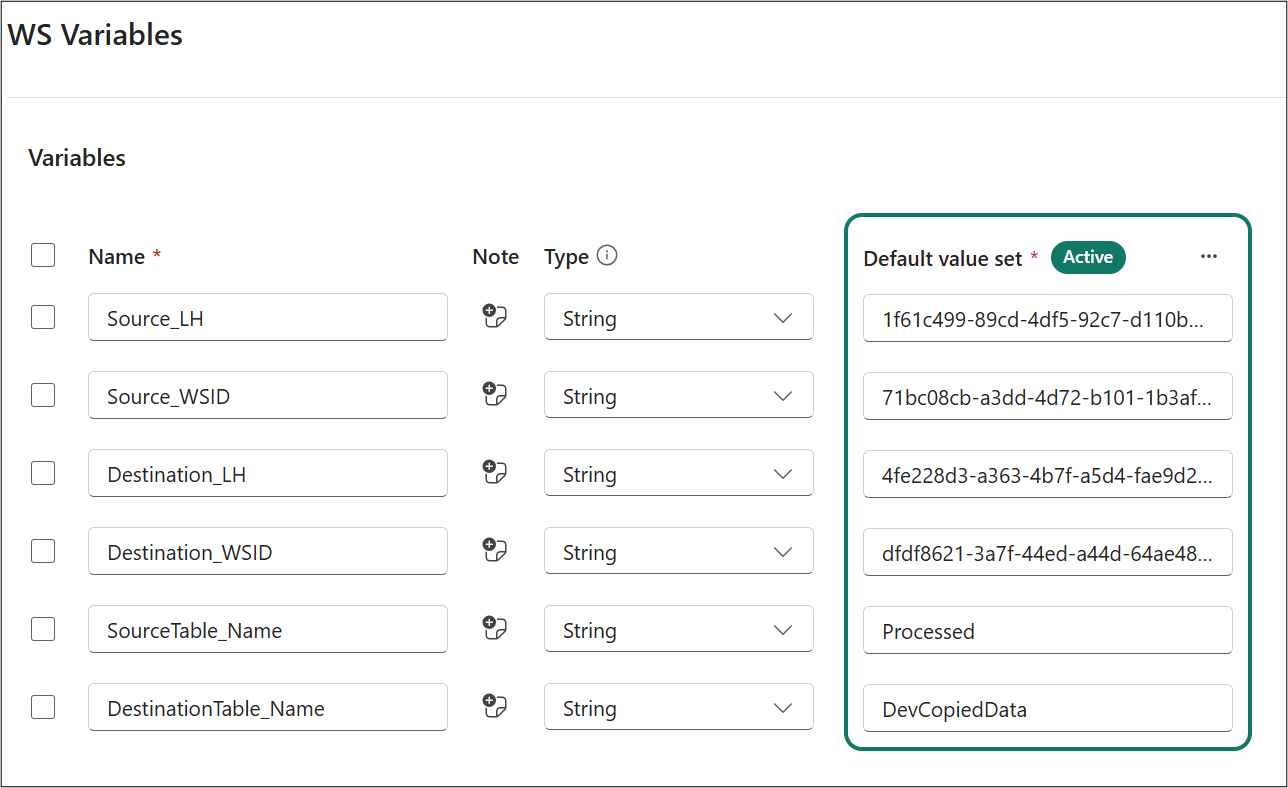
Create the following variables:
Name Type Default value set Source_LHString <GUID of SourceLH_Stage lakehouse> Source_WSIDString <GUID of SourceLH_Stage workspace> Destination_LHString <GUID of SourceLH_Dev lakehouse> Destination_WSIDString <GUID of SourceLH_Dev workspace> SourceTable_NameString ProcessedDestinationTable_NameString DevCopiedDataSelect Save.
Create alternate value sets
In these steps, you add the alternate value sets to your variable library:
Create the first value set:
In the WS Variables variable library, select Add value set.
Enter Test VS for the name, and then select Create.
Create the following variables:
Name Type Default value set Source_LHString <GUID of SourceLH_Dev lakehouse> Source_WSIDString <GUID of SourceLH_Dev workspace> Destination_LHString <GUID of SourceLH_Test lakehouse> Destination_WSIDString <GUID of SourceLH_Test workspace> SourceTable_NameString DevCopiedDataDestinationTable_NameString TestCopiedDataSelect Save > Agree.
Create the second value set:
Select Add value set.
Enter Prod VS for the name, and then select Create.
Create the following variables:
Name Type Default value set Source_LHString <GUID of SourceLH_Test lakehouse> Source_WSIDString <GUID of SourceLH_Test workspace> Destination_LHString <GUID of SourceLH_Prod lakehouse> Destination_WSIDString <GUID of SourceLH_Prod workspace> SourceTable_NameString TestCopiedDataDestinationTable_NameString ProdCopiedDataSelect Save > Agree.
Create the Pipeline_Deploy pipeline and declare variables
In these steps, you create your pipeline and declare your variables:
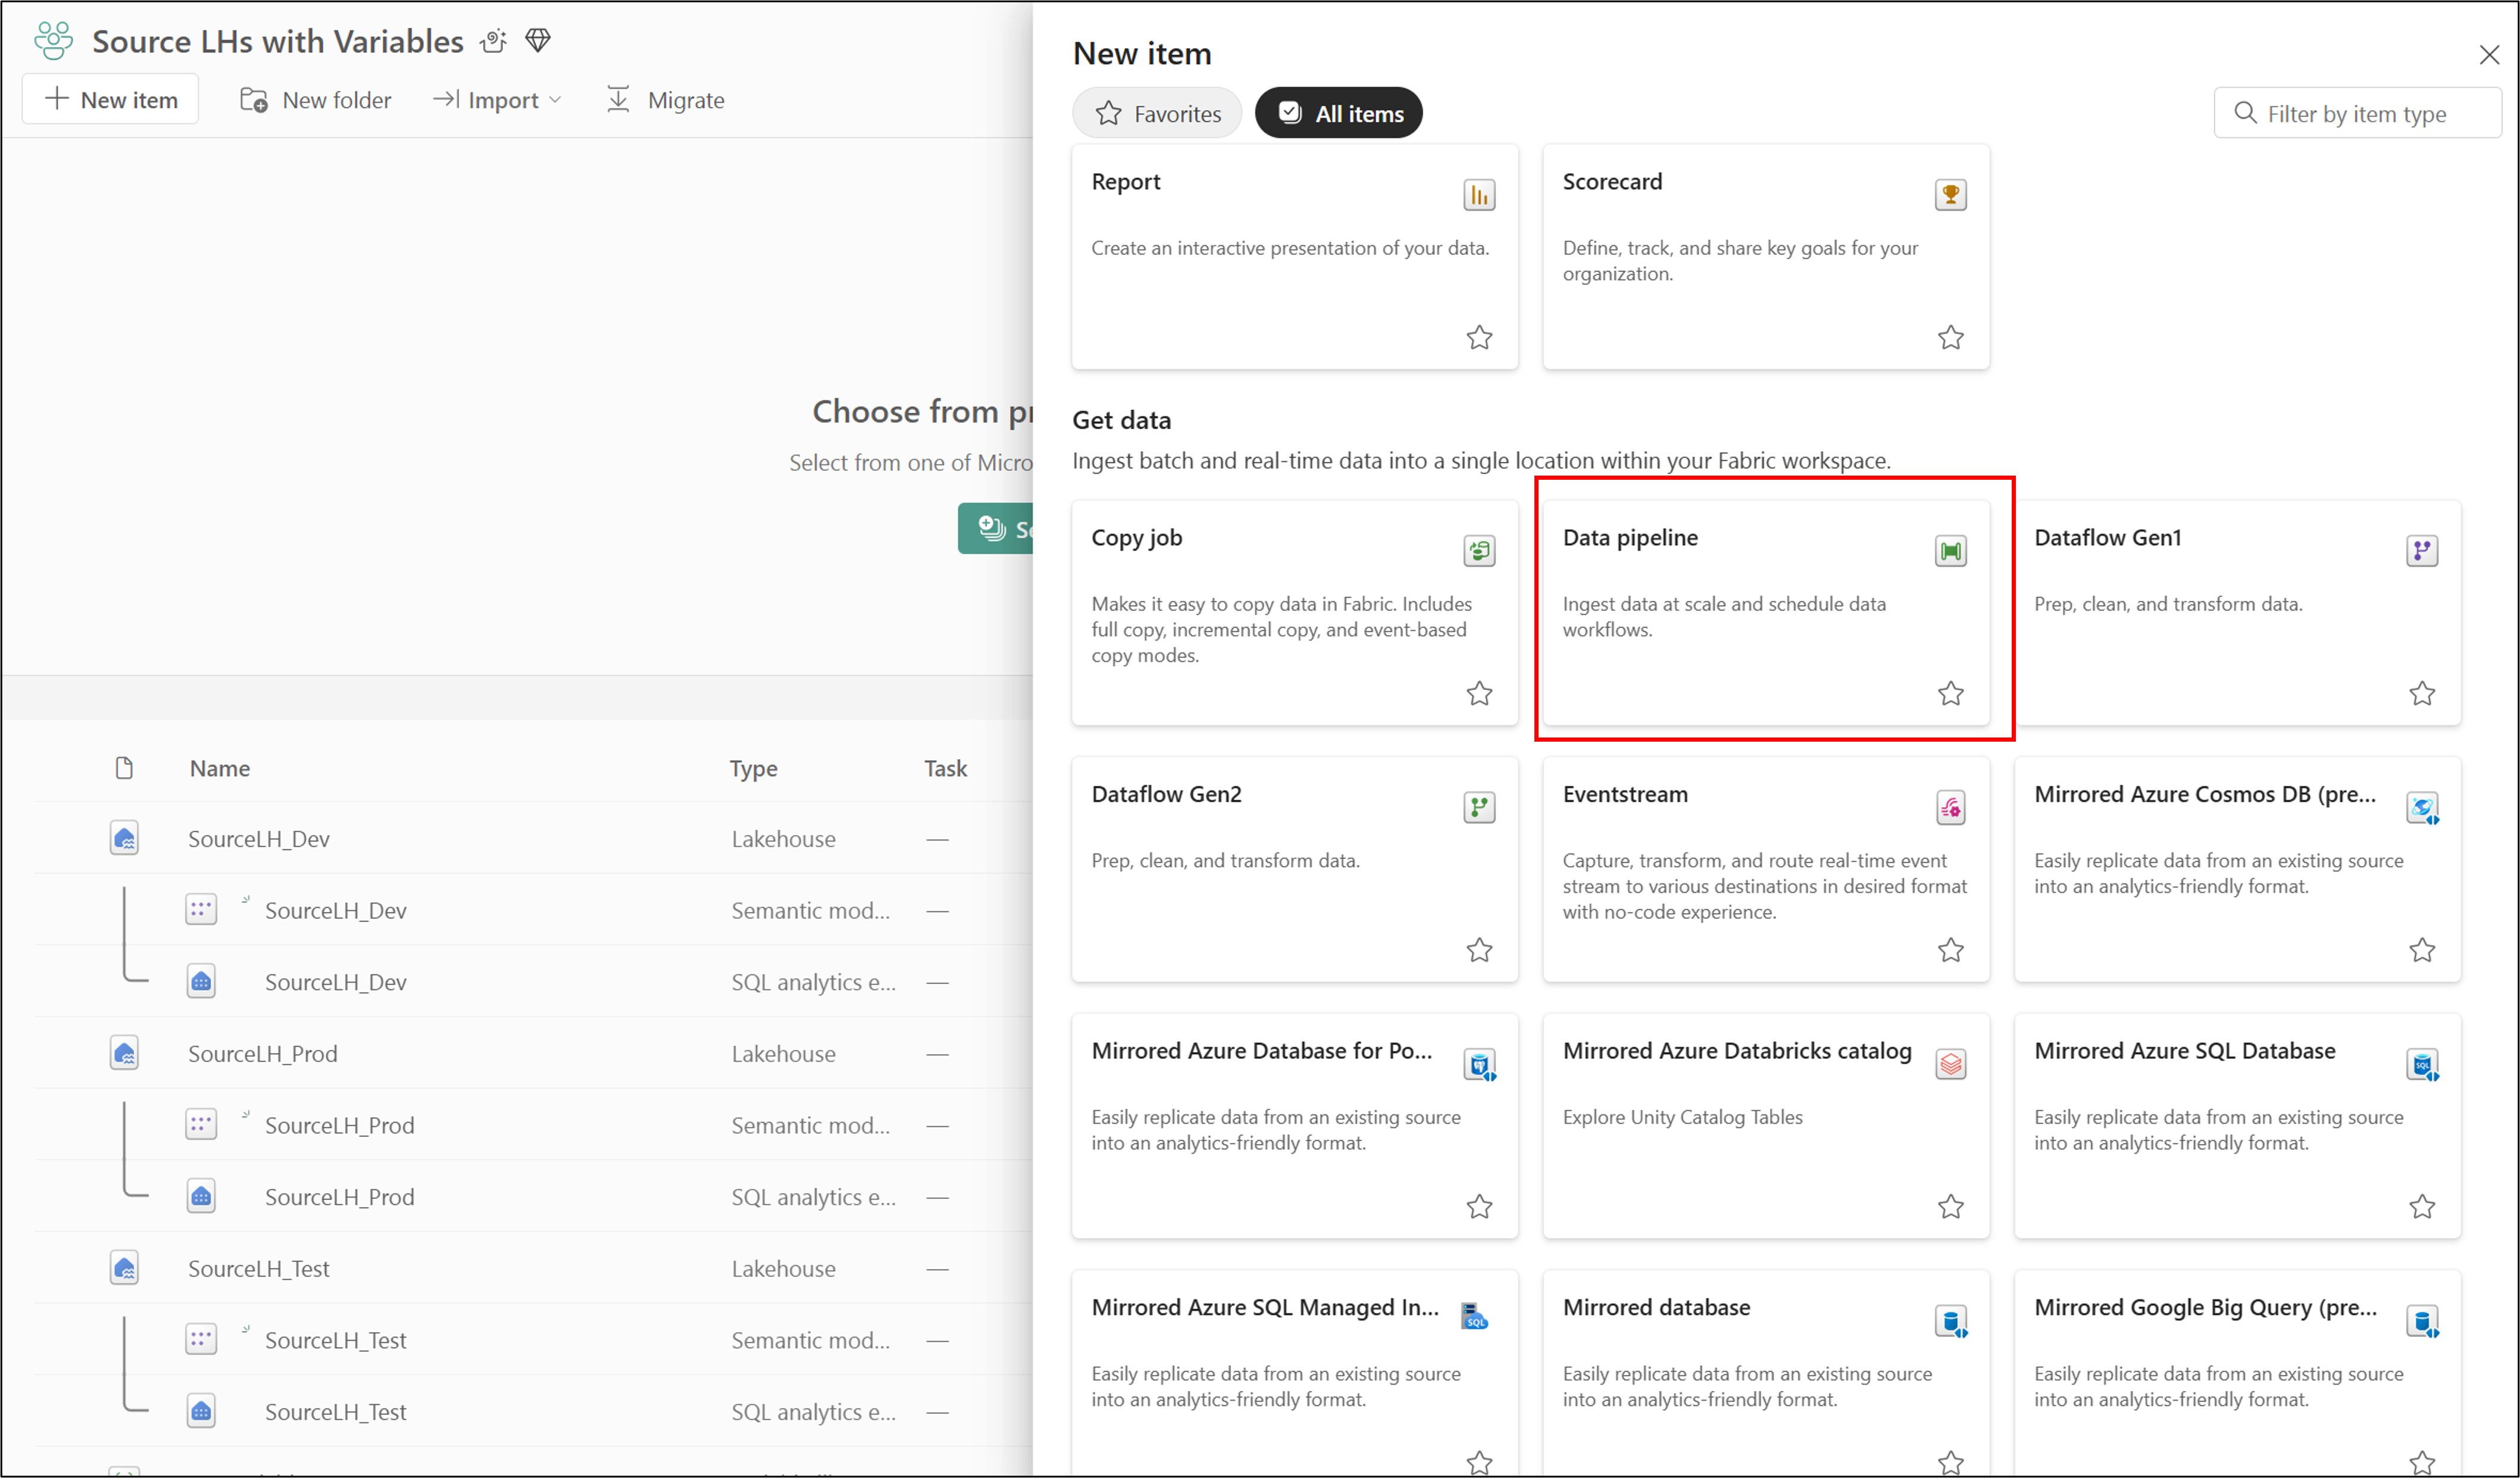
In the Source LHs with Variables workspace, select New item.
Under Get data, select Data pipeline.
Enter the name Pipeline_Deploy, and then select Create.
Select Copy data > Add to canvas.
Select the canvas so that the focus is off Copy data.
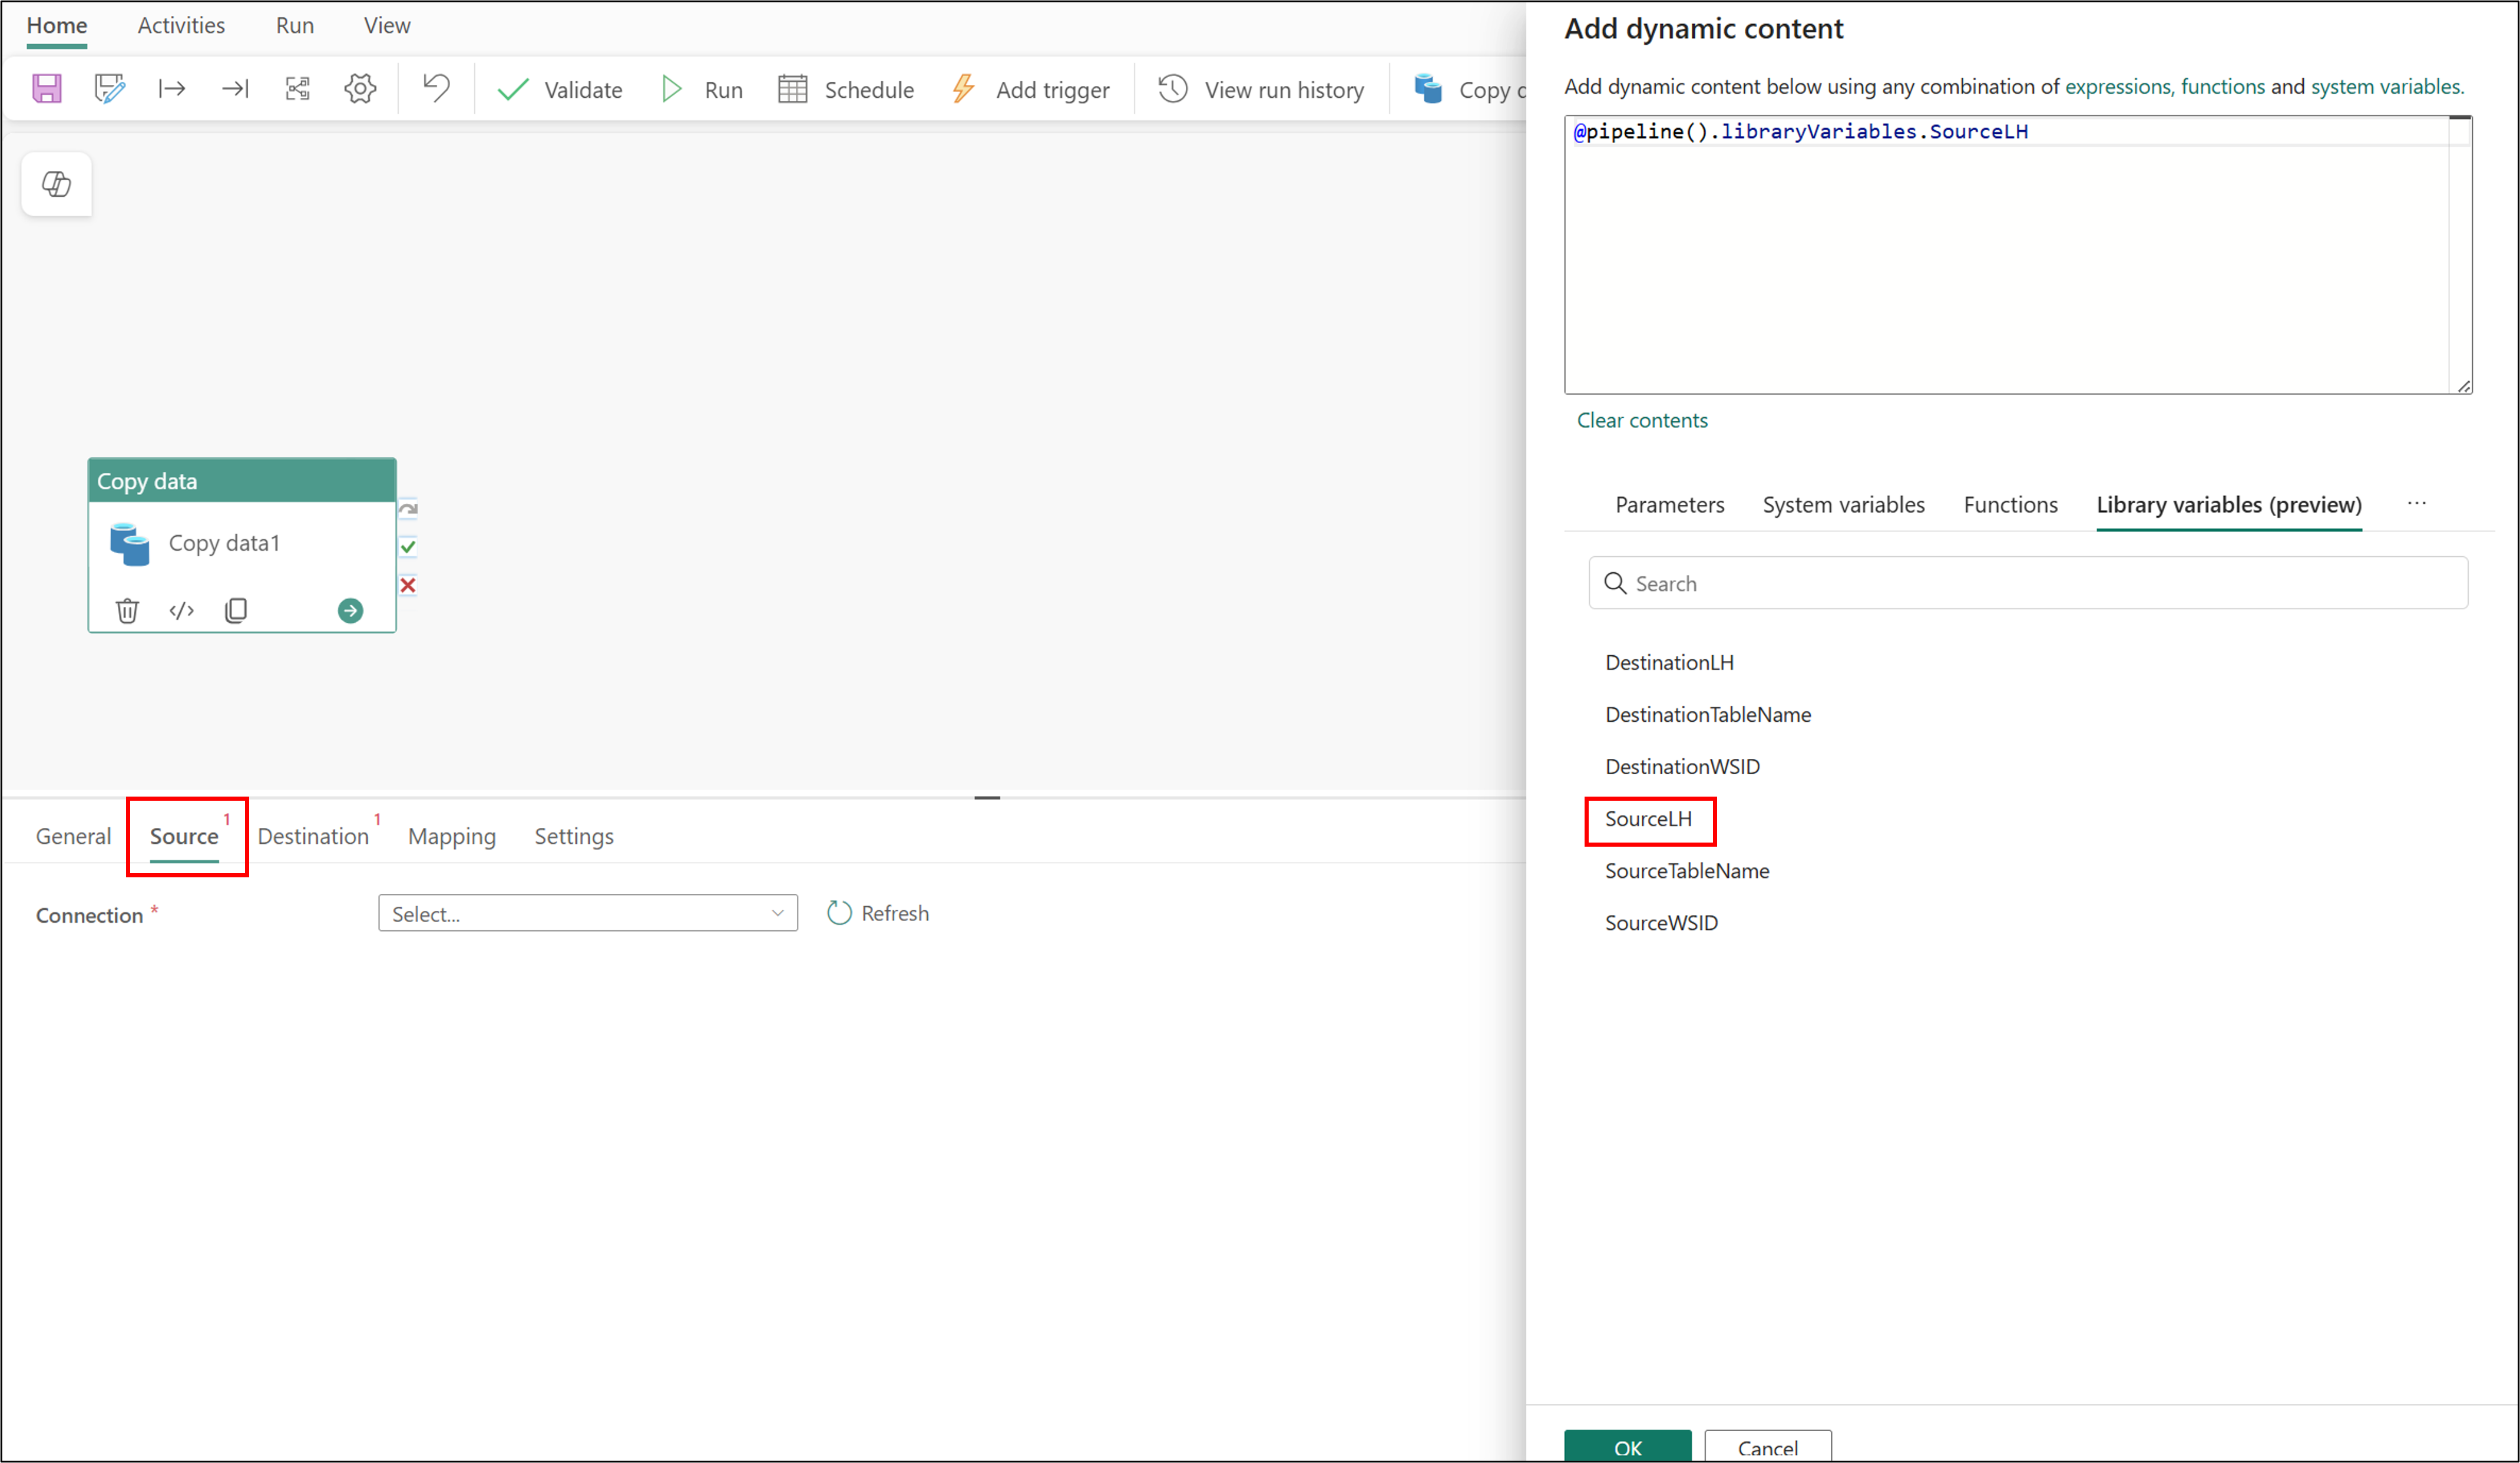
Select Library variables (preview).
Select New, and then add the following variables:
Name Library Variable name Type SourceLHWS Variables Source_LHString SourceWSIDWS Variables Source_WSIDString DestinationLHWS Variables Destination_LHString DestinationWSIDWS Variables Destination_WSIDString SourceTableNameWS Variables SourceTable_NameString DestinationTableNameWS Variables DestinationTable_NameString Select Save.
Configure the source connection for the Pipeline_Deploy pipeline
In these steps, you configure the source connection for your pipeline:
In the Source LHs with Variables workspace, go to Pipeline_Deploy.
On the canvas, select Copy data so that the focus is on Copy data.
Select Source.
Configure SourceLH:
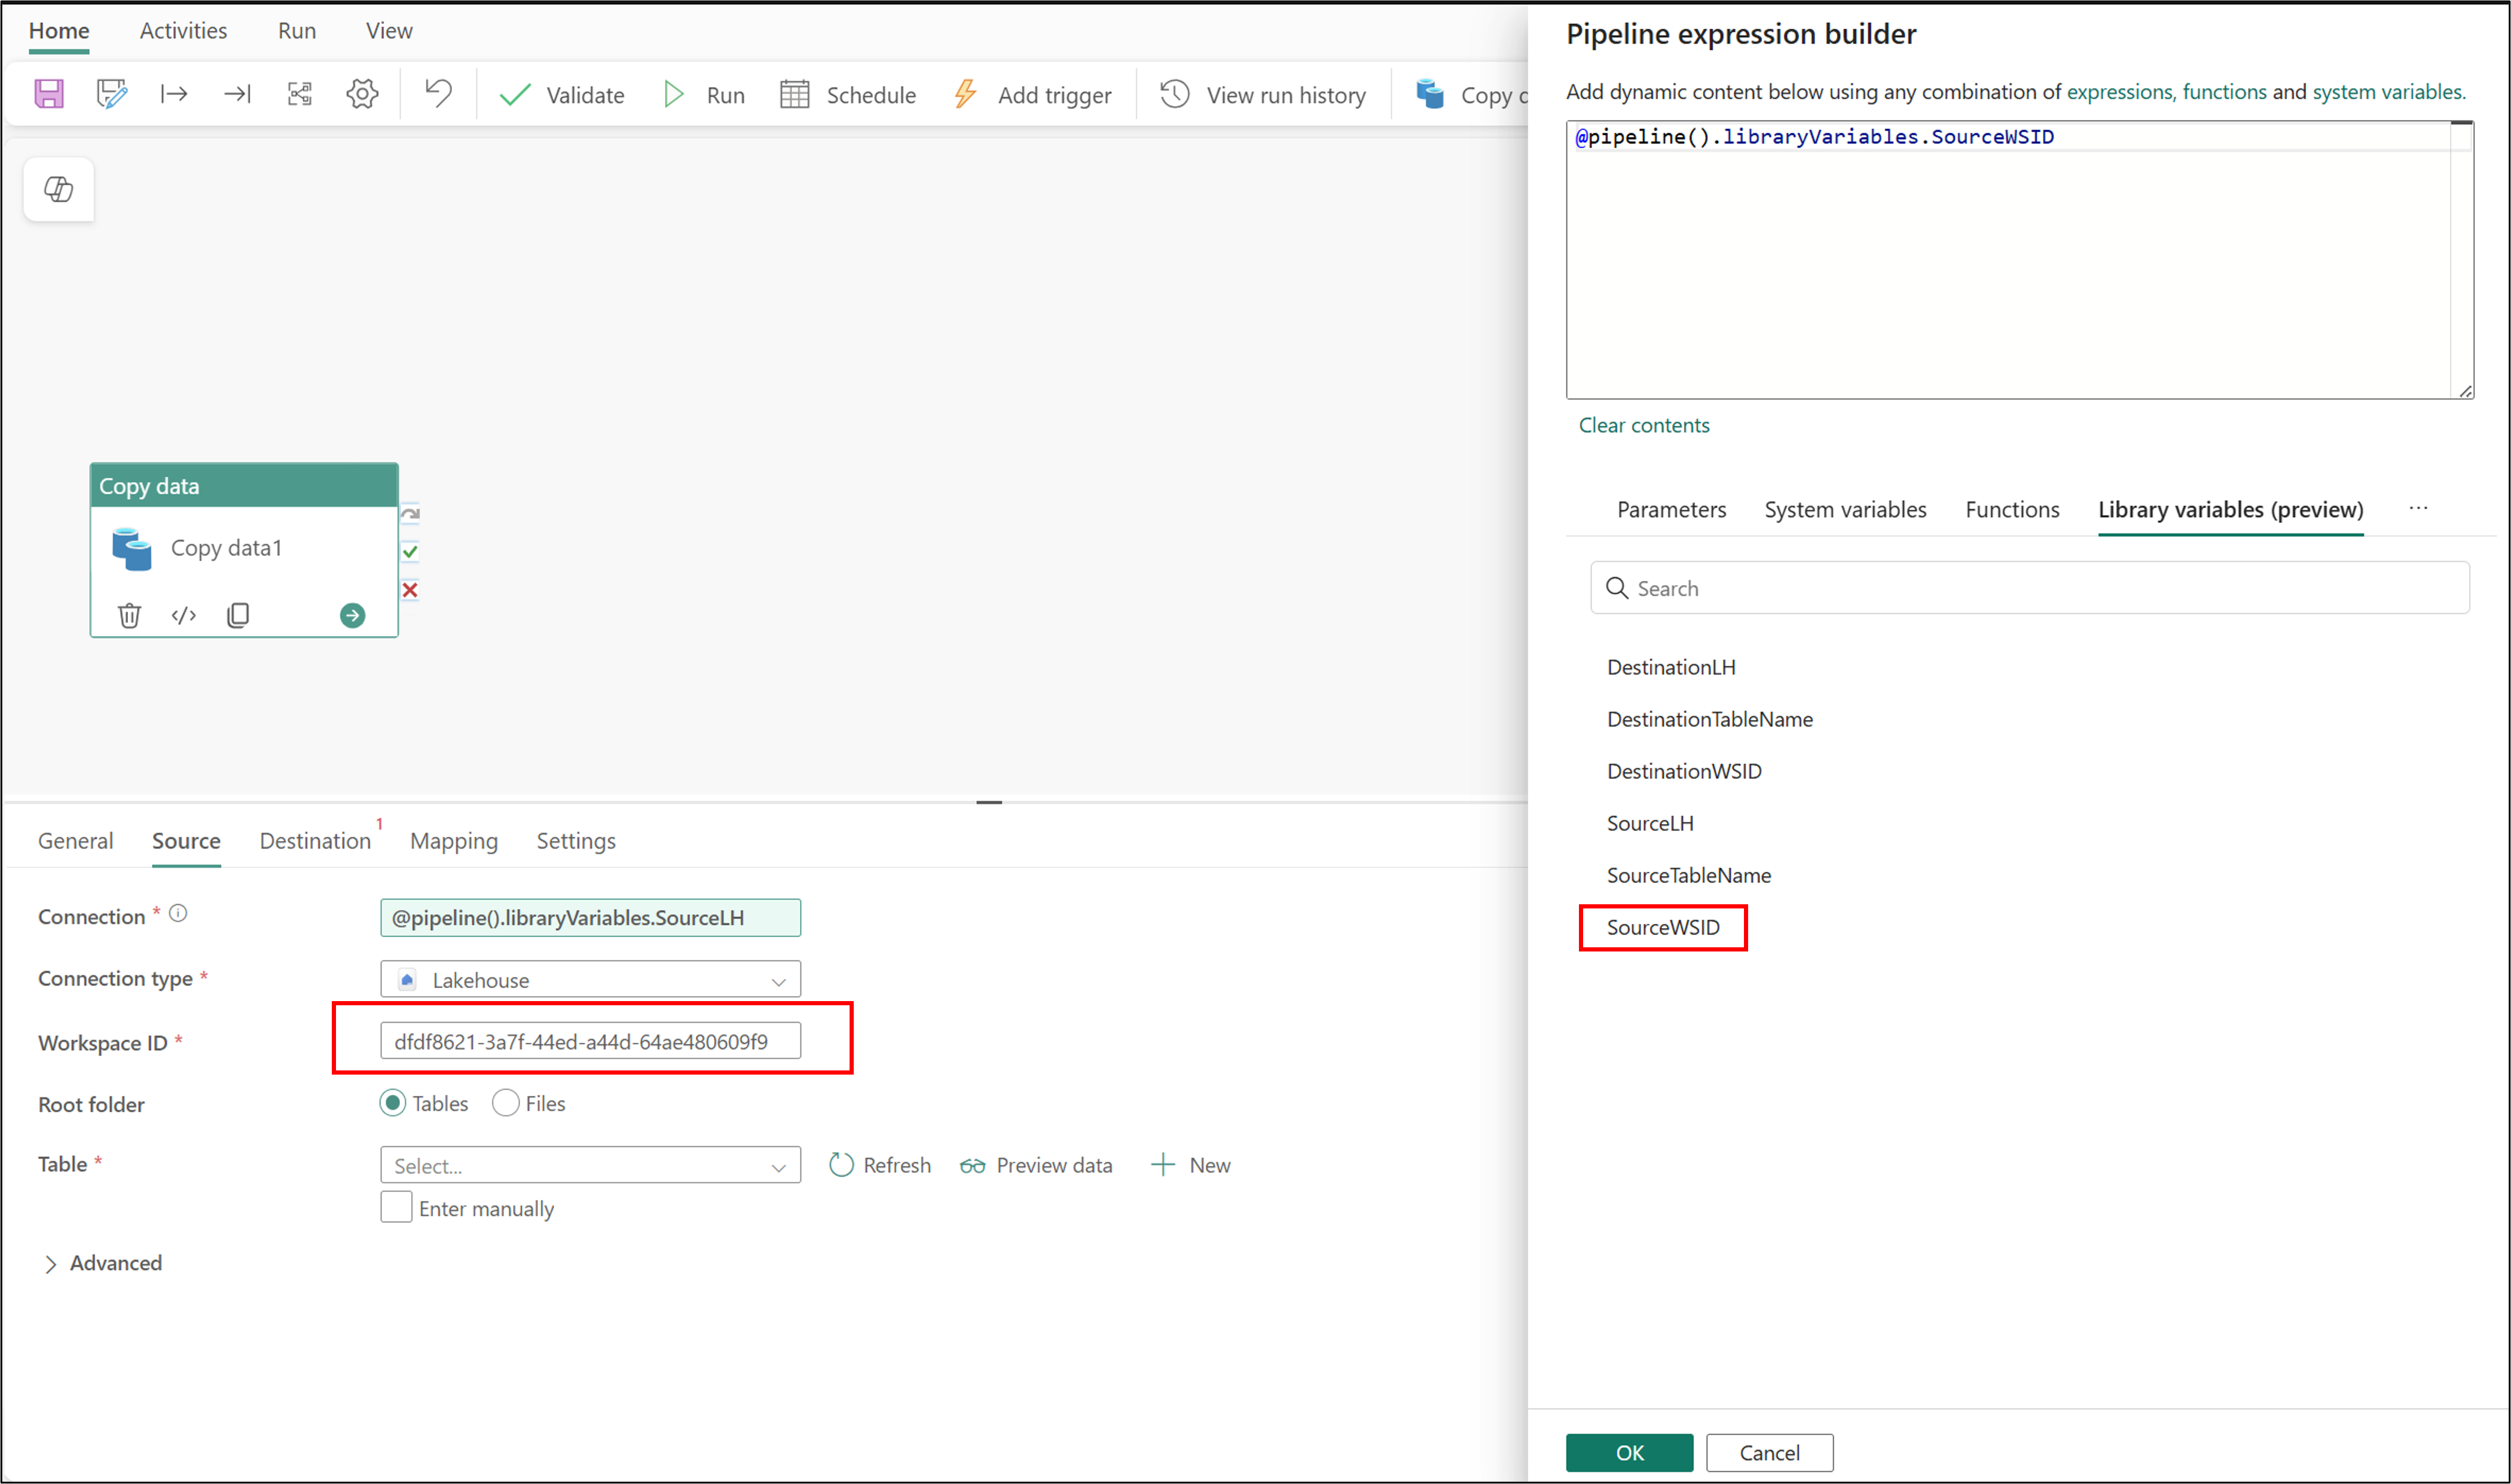
Configure SourceWSID:
Configure SourceTableName:
Now that the source connection is set up, you can test it. Select Preview data, and then select OK on the flyout. After the data is populated, you can close the data preview.
Configure the destination connection for the Pipeline_Deploy pipeline
In these steps, you configure the destination connection for your pipeline:
In the Source LHs with Variables workspace, go to Pipeline_Deploy.
On the canvas, select Copy data so that the focus is on Copy data.
Select Destination.
Configure SourceLH:
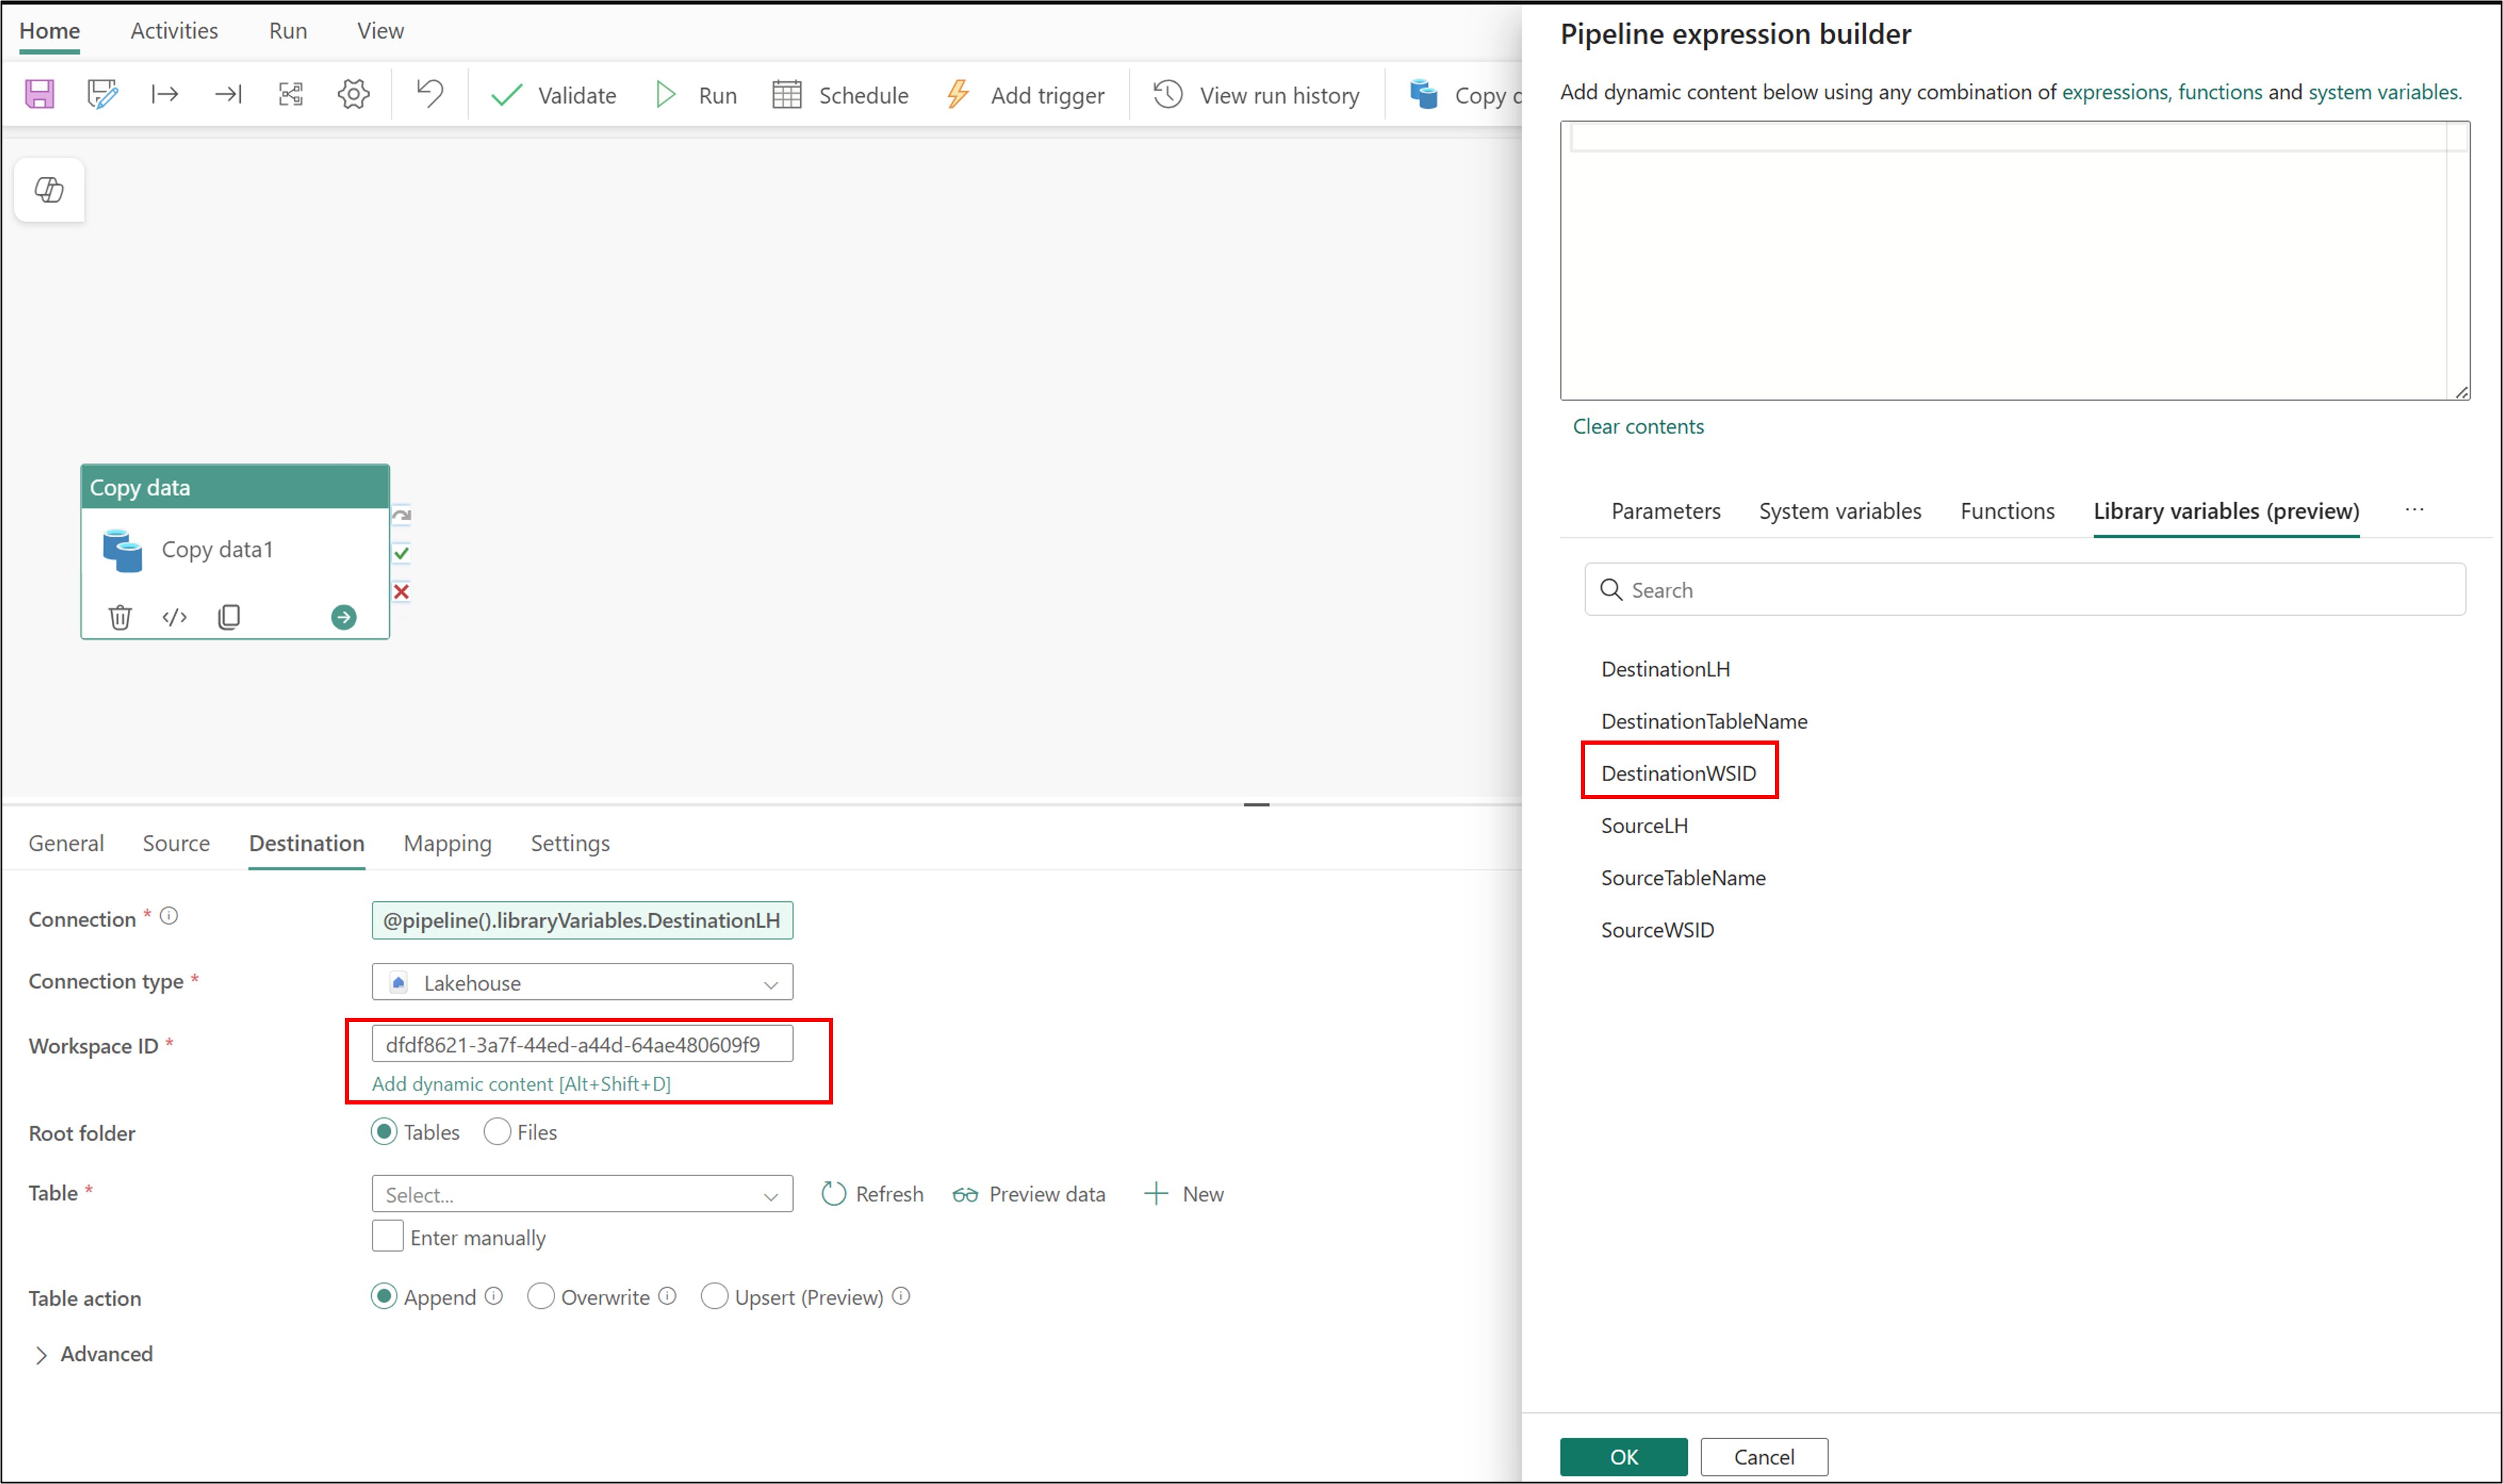
Configure DestinationWSID:
Configure DestinationTableName:
Now that the destination connection is set up, save the pipeline and select Run. Confirm that it successfully runs.
Create the deployment pipeline
Now, create your deployment pipeline:
In the Source LHs with Variables workspace, select Create deployment pipeline.
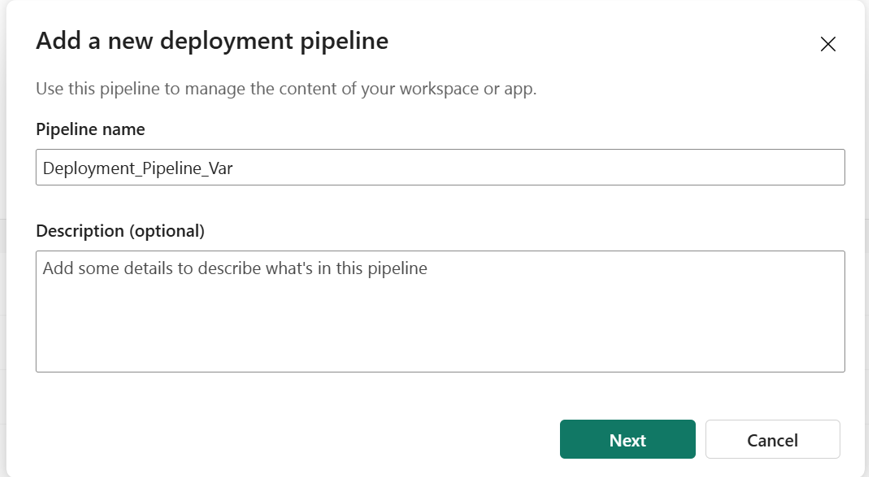
Name the pipeline Deployment_Pipeline_Var, and then select Next.
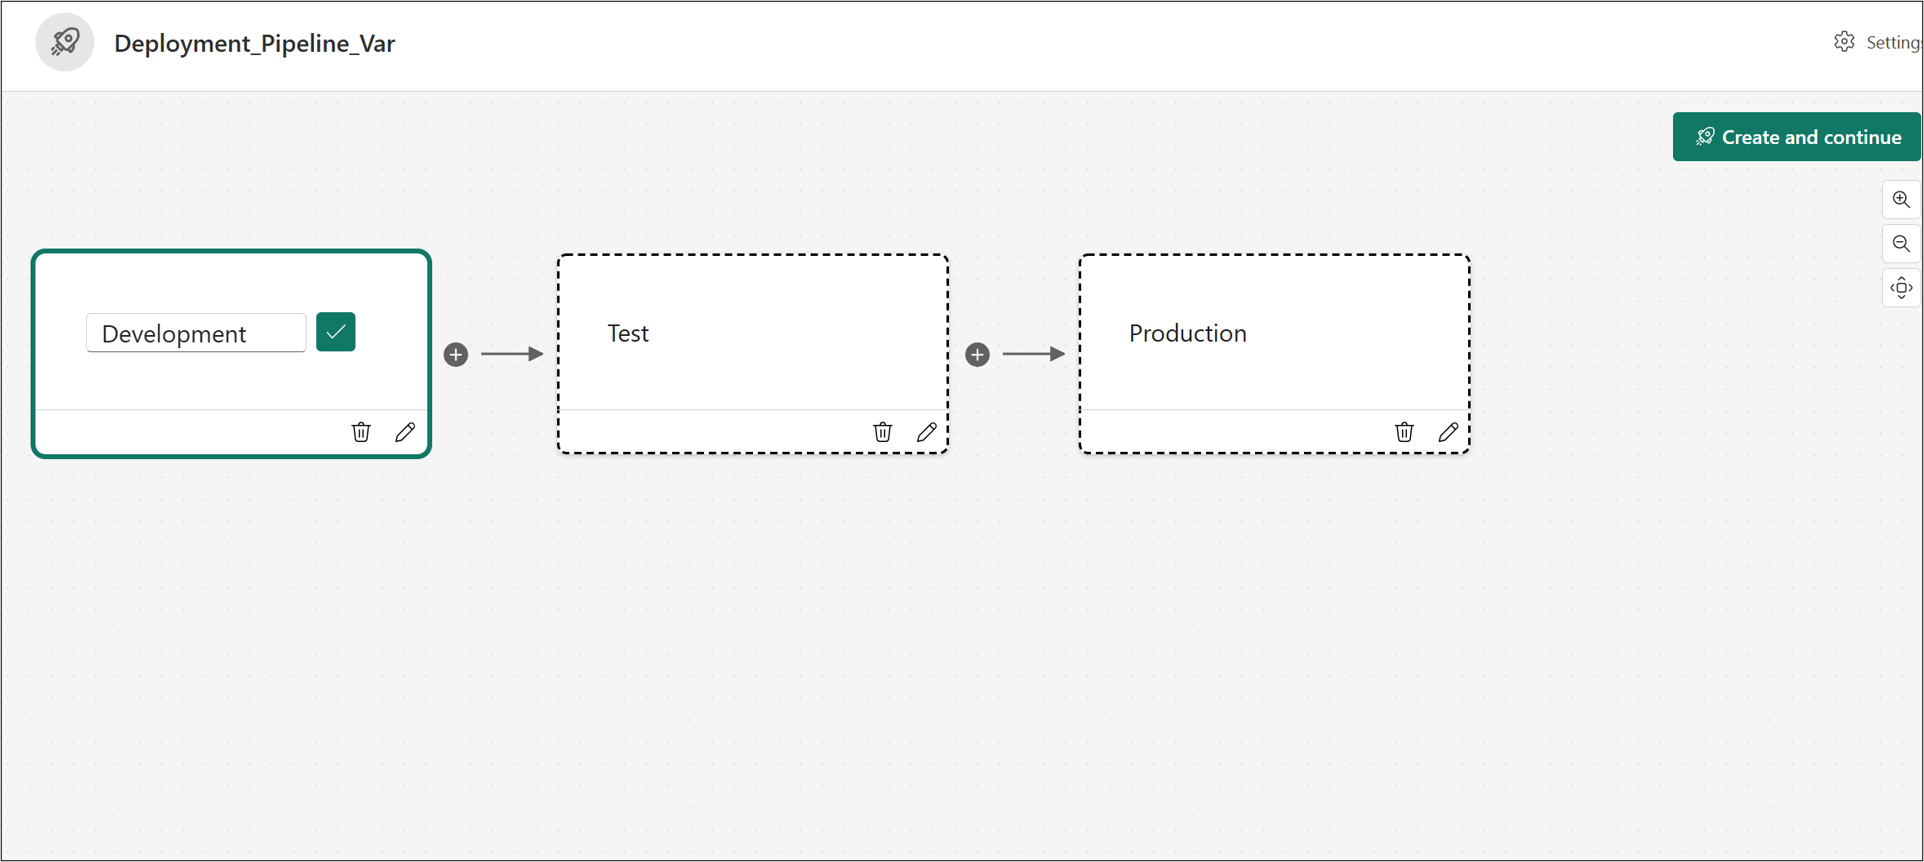
In the deployment pipeline, select Create and continue.
For the Development stage:
For the Test stage:
For the Production stage:
Set the variable library's active set for each stage
In these steps, you configure the active set for each stage in your deployment pipeline:
Configure the active set for the Test stage:
Configure the active set for the Prod stage:
On the sidebar, select the Deployment_Pipeline_Var pipeline.
Select the Prod stage.
Select WS Variables.
Select the ellipsis (...), and then select Set as active. Select the Set as Active button.
Select Save > Agree.
Verify and test the variable library
Now that you set up the variable library and configured all of the active sets for each stage of the deployment pipeline, you can verify them:
Check the SourceLHs_Dev lakehouse:
Switch to the SourceLHs_Test lakehouse and repeat the preceding steps.
The TestCopiedData table shouldn't appear because you haven't run the pipeline yet with the Test VS active set.
Switch to the SourceLHs_Prod lakehouse and repeat the preceding steps.
The ProdCopiedData table shouldn't appear because you haven't run the pipeline yet with the Prod VS active set.
Check the Test stage of the Deployment_Pipeline_Var pipeline:
Switch to the Deployment_Pipeline_Var pipeline and select the Test stage.
Select the Pipeline_Deploy pipeline.
Select Run. This process should finish successfully.
Check the SourceLHs_Test lakehouse again:
Check the Production stage of the Deployment_Pipeline_Var pipeline:
Switch to the Deployment_Pipeline_Var pipeline and select the Production stage.
Select the Pipeline_Deploy pipeline.
Select Run. This process should finish successfully.
Check the SourceLHs_Prod lakehouse again:
Switch to the SourceLHs_Prod lakehouse.
Change the connection from Lakehouse to SQL analytics endpoint.
In the explorer, expand Schemas > dbo > Tables.
Confirm that the ProdCopiedData table appears.
Customize the variable values in Git (optional)
To see how the variable library is represented in Git, or to edit the variables from a Git repository:
In the workspace, select Source control and connect the workspace to a Git repository.
On the Source control pane, select Commit to push the workspace content to the Git repository.
The Git repo has a folder for each item in the workspace. A folder called WS variables.VariableLibrary represents the variable library item. For more information about the contents of this folder, see Variable library CI/CD.
Compare the ProdVS.json and TestVS.json files in the valueSets folder. Confirm that the
overridesvariable is set to the different values. You can edit these values directly in the UI or by editing this file in Git and updating it to the workspace.{ "$schema": "https://developer.microsoft.com/json-schemas/fabric/item/VariablesLibrary/definition/valueSets/1.0.0/schema.json", "valueSetName": "Test VS", "overrides": [ { "name": "Source_LH", "value": "4fe228d3-a363-4b7f-a5d4-fae9d2abca43" }, { "name": "DestinationTableName", "value": "TestCopiedData" } ] }{ "$schema": "https://developer.microsoft.com/json-schemas/fabric/item/VariablesLibrary/definition/valueSets/1.0.0/schema.json", "valueSetName": "Prod VS", "overrides": [ { "name": "Source_LH", "value": "c0f13027-9bf4-4e8c-8f57-ec5c18c8656b" }, { "name": "DestinationTableName", "value": "ProdCopiedData" } ] }


