Note
Access to this page requires authorization. You can try signing in or changing directories.
Access to this page requires authorization. You can try changing directories.
Virtual networks and private endpoints are features in cloud computing platforms, like Azure, that enhance the security and isolation of resources. These endpoints let you connect to specific Azure services without exposing them to the public internet.
Virtual network protected endpoints enable access to Azure services from within the virtual network while keeping traffic within the Azure backbone network. They prevent exposure of the service to the public internet. Private endpoints build on virtual network protected endpoints by providing a private IP address within your virtual network for the Azure service. This private IP address lets you access the service, so all traffic stays within your virtual network and doesn't go through the public internet. Private endpoints are available for various Azure services, including Azure Storage, Azure SQL Database, Azure App Service, Azure Key Vault, and more.
Virtual network protected endpoints are essential for scenarios where security and network isolation are critical requirements. They help organizations ensure that their data and resources are accessible only to authorized users and applications within a controlled network environment. This approach minimizes exposure to potential security threats from the public internet. This article outlines the steps to create protected data source connections for data profiling and data quality scans.
User permission requirements
- Compute provision – Governance Domain Owner
- Managed private endpoint creation - Governance Domain Owner
- Private endpoint approval – Owner of the Azure storage source
Caution
Compute and Managed Private Endpoint connections are shared across all governance domains of the same purview account for a specific region and datasource.
Manage virtual network provisioning
Microsoft Purview Data Governance Administrators can provision a virtual network (vNet) compute location in supported Azure regions from the Unified Catalog Admin page by navigating to Settings > Unified Catalog > Virtual network. Select an available region from the dropdown to configure the virtual network. Regions that are already configured are greyed out.
Data Governance Administrators can delete a configured region by selecting X on the region's row. This action removes all associated data quality connections linked to the virtual network across business domains. You can't delete a region during provisioning. The provisioning process has three stages: Provisioning, Completed, and Available.
Configure a data quality managed virtual network
Configure a data quality managed virtual network by creating a connection to a protected data source.
In the Unified Catalog, select Health Management, then select Data quality.
Select a governance domain from the list.
From the Manage dropdown list, select Connections to open connections page.
Select New tab to create a new connection for the data products and data assets of your governance domain.
In the connection page, add connection display name, description, and select the data source type to be connected.
Add other data source details like Subscription and Storage Account name or Server Name and database name, depending on the source.
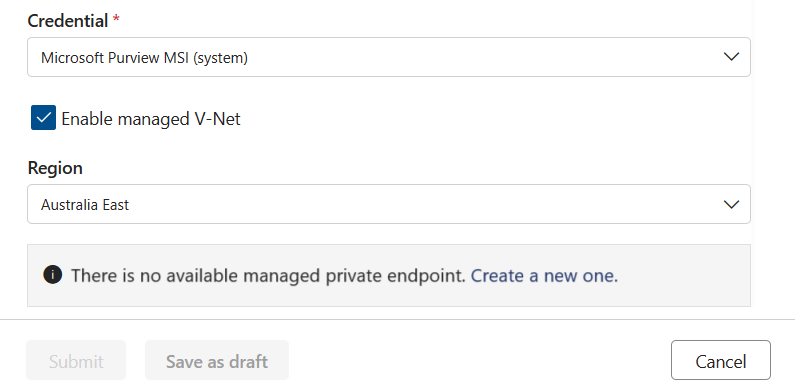
Select the Enable managed V-Net checkbox.
Select the region where the data source is housed.
With all these details, Microsoft Purview data quality checks if a compute infrastructure has already been created for the account in that region. If not, you're prompted to create a new virtual network dedicated compute.

Tip
Provisioning of compute can take up to 10 minutes, so after requesting compute provisioning, you can save the connection creation request in draft mode and edit it later.
Once the compute is provisioned, data quality checks if a private endpoint connection to asset already exists. If not, you're prompted to create a private endpoint connection.

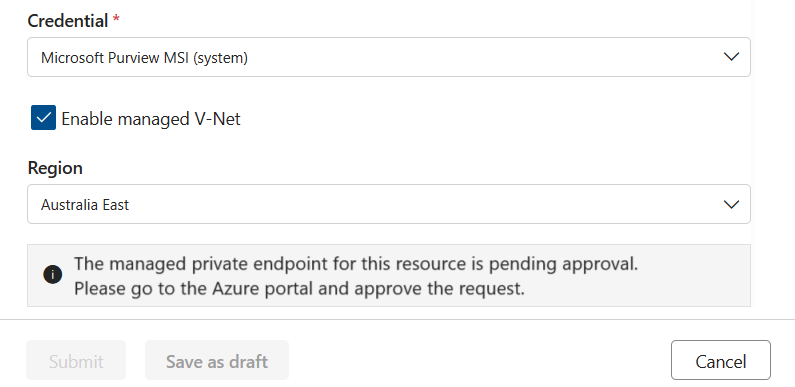
Once the private endpoint is created, or if one already exists but wasn't approved, then you're requested to approve the private endpoint connection request.

You can approve this request from the Networking tab in Storage Account or SQL Server. Select the Private access tab, select a pending connection, and select Approve.

Select Yes to approve the connection.

You can now see that the request shows as Approved.

Tip
After generating the private endpoint connection request, you can save the connection as a draft and resume once the request is approved.
Once the private endpoint connection is created and approved, you can submit the connection.

Caution
Test connection isn't currently supported for virtual network protected assets.
After the connection is completed, you can run data quality jobs as usual against the virtual network protected data assets.
Note
Virtual Network currently supports only these data sources:
- Azure Data Lake storage
- Azure SQL
- Synapse serverless and Synapse Data Warehouse
- Azure Databricks
- Snowflake
- Fabric OneLake (in tenant level)
For data source specific virtual network connection setup, see these resources:
- Data quality for Azure Databricks UC
- Data quality for Azure Synapse serverless and data warehouse
- Data quality for Snowflake data
- Data quality for Fabric Lakehouse
For Azure SQL and Azure Data Lake storage, follow the steps described earlier at Configure a data quality managed virtual network.
Schema import
Schema import is supported for the virtual network data sources listed in the preceding section. To import a schema from your virtual network data sources, use the following steps:
- Select Data quality from Health Management.
- Select a business domain, then select a data product, then select a data asset from that data product. You arrive at the data quality overview page.
- Select Schema, then select the Schema management toggle.
- Select Import schema to import the schema.